Fall Fresh: Top 7 Cleaning Services to Get Your Home Ready for Autumn

As the leaves start to change colors and the air turns crisp, it’s time to embrace the beauty of fall. However, with this season also comes a new set of cleaning challenges. To help you prepare your home for autumn’s arrival, we’ve compiled a list of the top 7 cleaning services that will leave your living space cozy, clean, and ready to welcome the fall season with open arms.

The top 7 cleaning services for fall

  1. Gutter Cleaning Services: Fall brings falling leaves, and those leaves often find their way into your gutters. Clogged gutters can lead to water damage, so it’s essential to have them cleaned before the rainy season begins. Professional gutter cleaning services can remove debris and ensure that your gutters are functioning correctly.
  2. Carpet Cleaning Services: With more time spent indoors during the cooler months, your carpets may have collected dirt and dust over the summer. A professional carpet cleaning service can refresh your carpets, remove stains, and improve indoor air quality, making your home cozy and inviting.
  3. Chimney Sweeping Services: If you have a fireplace, it’s essential to have your chimney cleaned and inspected before lighting those first autumn fires. A chimney sweeping service will remove creosote buildup and ensure that your fireplace is safe and efficient.
  4. Window Cleaning Services: As the sun’s angle changes in the fall, it can reveal streaks and smudges on your windows that went unnoticed in the summer. Professional window cleaning services can make your windows sparkle, allowing more natural light to brighten your home during the shorter days of fall.
  5. Deep Cleaning Services: Fall is an excellent time for a thorough deep cleaning of your home. This service includes cleaning areas that are often overlooked, such as baseboards, ceiling fans, and behind appliances. A deep cleaning will leave your home feeling fresh and rejuvenated.
  6. Yard Cleanup Services: Don’t forget about your outdoor spaces. Fall is a season of falling leaves, and your yard can quickly become covered in debris. Yard cleanup services can help with leaf removal, lawn care, and preparing your garden for winter.
  7. HVAC Cleaning and Maintenance Services: As the weather cools, you’ll be relying on your heating system more frequently. It’s crucial to have your HVAC system cleaned and maintained to ensure it’s operating efficiently and providing clean air. This service can help improve indoor air quality and lower your energy bills.

Conclusion:

With these top 7 cleaning services, your home will be in tip-top shape for the fall season. From ensuring your gutters are clear to enjoying the warmth of a clean fireplace, these services will help you embrace the beauty and coziness of autumn without the stress of cleaning chores. So, why wait? Schedule these services today and get ready to enjoy a clean and comfortable home this fall.

About Benchmark

Benchmark Restoration and Cleaning is a trusted and reputable company based in Vancouver, Washington, known for its exceptional restoration and cleaning services. With a strong presence in the Vancouver area, Benchmark has established itself as a go-to source for homeowners and businesses seeking top-notch solutions for various cleaning and restoration needs. Their team of highly trained professionals is dedicated to providing a wide range of services, including water damage restoration, fire damage restoration, mold remediation, carpet cleaning, and more. What sets Benchmark apart is their commitment to excellence, customer satisfaction, and the use of cutting-edge techniques and equipment to deliver outstanding results. Whether you’re dealing with the aftermath of a disaster or simply seeking a deep cleaning for your home or business, Benchmark Restoration and Cleaning is a name synonymous with quality and reliability in Vancouver, WA.

Attention Property Managers: Tired of Wrestling with Insurance Companies? We’ve Got Your Back!

Let’s face it – the insurance claim process is like wading through a swamp with a blindfold on. If you’re a property manager who’s fed up with the bureaucratic tango required to handle insurance claims after water damage, then listen up. I’m talking to you about Benchmark Restoration & Cleaning, the cavalry you need to make claim handling a breeze.

Unraveling the Insurance Web

Dealing with insurance companies can be a maze of paperwork, red tape, and endless back-and-forths. It’s enough to make even the most patient person want to tear their hair out. That’s where we come in – we’re not just restoration experts; we’re claim handling warriors. At Benchmark Restoration & Cleaning, we’ve decoded the insurance web, and we’re here to guide you through it with finesse.

Navigating the Complexities

Claims aren’t for the faint of heart. But you’re no novice, and neither are we. Our battle-hardened team knows the ins and outs of claim handling like a seasoned general. From documentation to negotiation, we’ve got the playbook to ensure you get the payout you deserve.

Maximizing Your Reimbursement Potential

a person holding a black pen

Don’t settle for scraps. When it comes to reimbursement, you deserve the full feast. Our meticulous documentation ensures that no detail is overlooked. We capture the extent of the damage, the restoration process, and everything in between. When you stand before the insurance company armed with our thorough evidence, you’re not just asking for reimbursement – you’re demanding it.

Efficiency that Leaves No Room for Excuses

Time is money, and wasted time is wasted cash. Our streamlined approach to claim handling cuts through the clutter and gets things moving. No more waiting, no more delays. When you partner with Benchmark Restoration & Cleaning, you’re partnering with efficiency itself.

Restoring More Than Property

Our mission isn’t just to restore property; it’s to restore your sanity. The claim handling process doesn’t have to be a nightmare. With Benchmark Restoration & Cleaning, it’s a walk in the park – a brisk, efficient, and headache-free walk.

Choose Claim Handling with Clout – Choose Benchmark Restoration & Cleaning

If you’re done battling insurance Goliaths on your own, it’s time to wave the white flag and call in the cavalry. Choose Benchmark Restoration & Cleaning for claim handling that’s strategic, effective, and in your corner.

Don’t fight claim battles alone. Choose Benchmark Restoration & Cleaning for claim handling that’s as savvy as it is successful.

How to prepare for your Healthy Home Package Cleaning

Benchmark’s Healthy Home Package is at the heart of every clean they offer – it’s their Core 10-Steps, Anti-Allergen Treatment, Speed Drying, Protectant, Sanitizing, and more. What it offers is a full spectrum of cleaning and sanitizing your home.

Here’s how to prepare for your upcoming Healthy Home Package Cleaning:

  1. Clear the Area: Prior to the cleaning appointment, remove any items or obstacles that could obstruct the cleaning process. If floors are to be cleaning, remove any loose or breakable items that can be of concern. If countertops, same, clear and clean the and other surfaces to allow the cleaners easy access to the areas that need attention.
  2. Declutter: Tidy up the space by removing excess clutter such as toys, clothes, or personal items. This will make it easier for the cleaners to focus on the cleaning tasks and ensure they can reach all the areas that need attention.
  3. Communicate Specific Needs: If there are any specific areas or items that require special attention, make sure to communicate this to the cleaning service beforehand. For example, if you have stains on upholstery or specific instructions for certain surfaces, let them know in advance.
  4. Prepare Pets: If you have pets, it’s a good idea to make arrangements to keep them in a separate area or outside during the cleaning appointment. This ensures the safety of both your pets and the cleaning technicians.
  5. Make Way for Parking: If parking is limited in your area, make sure to reserve or provide a space for the cleaning team’s vehicle. This will help facilitate a smooth and timely arrival.
  6. Ask About Pre-Cleaning Instructions: Contact Benchmark Restoration and Cleaning directly to inquire about any specific pre-cleaning instructions they may have. They can provide you with their recommended guidelines for preparing your space before their arrival.

What’s IS in a Healthy Home Cleaning?

Healthy Home Package w/Core 10 Step Cleaning

Step #1.  Pre Inspection:  Every carpet is thoroughly inspected before cleaning, noting level of soiling, spots/stains, and wear.

Step #2.  Furniture Moving:  Sofas, Chairs and Tables are carefully moved.

Step #3.  Pre-Spray:  Most used areas are pre-treated to break down Soil.

Step #4.  Pre-Spot:  Difficult spots are treated with special solutions to increase chances for removal.

Step #5.  Pre-Grooming:  Special tools are used to loosen the soils.

Step #6.  Soil Extraction & Rinse:  The loosened soil is then thoroughly extracted

Step #7.  Neutralize:  Your cleaning area is pH balanced to eliminate soil attracting residues.

Step #8.  Post Spot Treatment:  Treatment of specialty spots is included.

Step #9:  Post-Grooming:  To set the area for appearance and faster drying.

Step #10:  Post Inspection:  A post walkthrough is performed with you to make sure you are thrilled!

HEALTHY HOME PACKAGE ADDS:

Step #11  DrySteem™ Extraction:  Our exclusive DrySteem™ System removes 85% more  moisture so your cleaned areas are dry in about 2-3 hours

Step #12  Factory FiberGuard Protectant:   To protect agains soil, liquid and oil based spills.

Step #13  Commercial Pile Lifting:  To remove the gritty dry soil.

Step #14 Spray & Wipe Down Baseboards:  Eliminating the dust that accumulates.

Step #15 DuraSan™ Sanitizing:  To assist in neutralizing bacteria, allergens, and dust mites.

Cleaning Length: The time to clean your items depends on the volume, and the amount of contents that require moving before, and after your cleaning. That said, most cleans take about 2 -3 Hours.

Drying Length: Drying time can vary based on severity of soiling, and humidity in the air. On it’s own, it can take approximately 2 – 3 hours to dry.

What’s NOT in a Healthy Home Cleaning

It has everything – It is the full spectrum to ensure your cleanest treatment possible.

The Healthy Home Package is the MOST POPULAR of the three packages Benchmark offers. Reviews of this package point to the DrySteem Rinse & Extraction as one of the major wins of this clean, because it leaves the carpet dry to the touch, and protected from future spills, stains and dirt.

How to prepare for your Cleaner Longer Package Cleaning

Benchmark’s Cleaner Longer Package is at the heart of every clean they offer – it’s their Core 10-Steps plus speed drying and factory protectant. What it offers is a comprehensive base that “checks” all the boxes. It’s has steam cleaning, spot removals are included, pH neutralizing is also a part of the clean, and grooming to ensure the best visual appeal.

Here’s how to prepare for your upcoming Cleaner Longer Package Cleaning:

  1. Clear the Area: Prior to the cleaning appointment, remove any items or obstacles that could obstruct the cleaning process. If floors are to be cleaning, remove any loose or breakable items that can be of concern. If countertops, same, clear and clean the and other surfaces to allow the cleaners easy access to the areas that need attention.
  2. Declutter: Tidy up the space by removing excess clutter such as toys, clothes, or personal items. This will make it easier for the cleaners to focus on the cleaning tasks and ensure they can reach all the areas that need attention.
  3. Pre-Vacuum: Removal of insolubles will have a decisive impact on how deep a Freshen Up cleaning will be. If vacuuming isn’t performed first – the Freshen Up will clean those insolubles (which is ok), however, to get the most bang for you buck, if you pre-vacuum, your Freshen Up will turn into the deepest clean possible. 
  4. Communicate Specific Needs: If there are any specific areas or items that require special attention, make sure to communicate this to the cleaning service beforehand. For example, if you have stains on upholstery or specific instructions for certain surfaces, let them know in advance.
  5. Prepare Pets: If you have pets, it’s a good idea to make arrangements to keep them in a separate area or outside during the cleaning appointment. This ensures the safety of both your pets and the cleaning technicians.
  6. Make Way for Parking: If parking is limited in your area, make sure to reserve or provide a space for the cleaning team’s vehicle. This will help facilitate a smooth and timely arrival.
  7. Ask About Pre-Cleaning Instructions: Contact Benchmark Restoration and Cleaning directly to inquire about any specific pre-cleaning instructions they may have. They can provide you with their recommended guidelines for preparing your space before their arrival.

What’s is IN a CLEANER LONGER Cleaning?

Freshen Up Package w/Core 10 Step Cleaning

Step #1.  Pre Inspection:  Every carpet is thoroughly inspected before cleaning, noting level of soiling, spots/stains, and wear.

Step #2.  Furniture Moving:  Sofas, Chairs and Tables are carefully moved.

Step #3.  Pre-Spray:  Traffic areas are pre-treated to break down Soil.

Step #4.  Pre-Spot:  Difficult spots are treated with special solutions to increase chances for removal.

Step #5.  Pre-Grooming:  Special tools are used to loosen the soils.

Step #6.  Soil Extraction & Rinse:  The loosened soil is then thoroughly extracted

Step #7.  Neutralize:  Your carpet is pH balanced to eliminate soil attracting residues.

Step #8.  Post Spot Treatment:  Treatment of specialty spots is included.

Step #9:  Post-Grooming:  To set the pile for appearance and faster drying.

Step #10:  Post Inspection:  A post walkthrough is performed with you to make sure you are thrilled!

CLEANER LONGER PACKAGE ADDS:

Step #11  DrySteem™ Extraction:  Our exclusive DrySteem™ System removes 85% more  moisture so your carpet is dry in about 2-3 hours

Step #12  Factory FiberGuard Protectant:   To protect agains soil, liquid and oil based spills.

Cleaning Length: The time to clean your items depends on the volume, and the amount of contents that require moving before, and after your cleaning. That said, most cleans take about 2 -3 Hours.

Drying Length: Drying time can vary based on severity of soiling, and humidity in the air. On it’s own, it can take approximately 3 – 6 hours to dry.

What’s NOT in a Cleaner Longer Cleaning

#1.  Pre Vacuuming: Research shows that 70% of most soiling in insoluble material (like sand), that will not dissolve or bond with a cleaning agent. This means that 70% is most productively removed by a deep, thorough vacuuming. 

#2. Sanitizing: Sanitizing, involves reducing the number of microorganisms on surfaces to a safe level determined by public health standards. It aims to kill or inhibit the growth of bacteria, viruses, and other harmful microorganisms that may cause illness or contamination. Sanitizing typically involves using disinfectants or sanitizing solutions, that are specifically designed to kill or reduce the presence of pathogens.

#3. Deodorizing: Deodorizing eliminates or neutralizes unpleasant odors from a space, object, or surface. Here’s how deodorizing works and what it accomplishes:

Deodorizing agents are designed to chemically react with odor-causing molecules, altering their structure or neutralizing them. This helps eliminate the unpleasant smell rather than just masking it temporarily.

#4. Anti-Allergen: Anti-allergen treatments are designed to reduce or minimize the presence of allergens in the environment. Allergens are substances that can trigger allergic reactions in susceptible individuals. These reactions can range from mild symptoms like sneezing and itching to more severe responses such as difficulty breathing or anaphylaxis. 

The Cleaner Longer Package is the MOST POPULAR of the three packages Benchmark offers. Reviews of this package point to the DrySteem Rinse & Extraction as one of the major wins of this clean, because it leaves the carpet dry to the touch, and protected from future spills, stains and dirt.

How to prepare for your Freshen Up Cleaning

Benchmark’s Freshen Up Package is at the heart of every clean they offer – it’s their Core 10-Steps. What it offers is a comprehensive base that “checks” all the boxes. It’s has steam cleaning, spot removals are included, pH neutralizing is also a part of the clean, and grooming to ensure the best visual appeal.

Here’s how to prepare for your upcoming Freshen Up Cleaning:

  1. Clear the Area: Prior to the cleaning appointment, remove any items or obstacles that could obstruct the cleaning process. If floors are to be cleaning, remove any loose or breakable items that can be of concern. If countertops, same, clear and clean the and other surfaces to allow the cleaners easy access to the areas that need attention.
  2. Declutter: Tidy up the space by removing excess clutter such as toys, clothes, or personal items. This will make it easier for the cleaners to focus on the cleaning tasks and ensure they can reach all the areas that need attention.
  3. Pre-Vacuum: Removal of insolubles will have a decisive impact on how deep a Freshen Up cleaning will be. If vacuuming isn’t performed first – the Freshen Up will clean those insolubles (which is ok), however, to get the most bang for you buck, if you pre-vacuum, your Freshen Up will turn into the deepest clean possible.
  4. Communicate Specific Needs: If there are any specific areas or items that require special attention, make sure to communicate this to the cleaning service beforehand. For example, if you have stains on upholstery or specific instructions for certain surfaces, let them know in advance.
  5. Prepare Pets: If you have pets, it’s a good idea to make arrangements to keep them in a separate area or outside during the cleaning appointment. This ensures the safety of both your pets and the cleaning technicians.
  6. Make Way for Parking: If parking is limited in your area, make sure to reserve or provide a space for the cleaning team’s vehicle. This will help facilitate a smooth and timely arrival.
  7. Ask About Pre-Cleaning Instructions: Contact Benchmark Restoration and Cleaning directly to inquire about any specific pre-cleaning instructions they may have. They can provide you with their recommended guidelines for preparing your space before their arrival.

What’s IS in a Freshen Up Carpet Cleaning

Freshen Up Package w/Core 10 Step Cleaning

Step #1.  Pre Inspection:  Every thing we clean is thoroughly inspected before cleaning, noting level of soiling, spots/stains, and wear.

Step #2.  Furniture Moving:  Sofas, Chairs and Tables are carefully moved.

Step #3.  Pre-Spray:  Traffic areas are pre-treated to break down Soil.

Step #4.  Pre-Spot:  Difficult spots are treated with special solutions to increase chances for removal.

Step #5.  Pre-Grooming:  Special tools are used to loosen the soils.

Step #6.  Soil Extraction & Rinse:  The loosened soil is then thoroughly extracted

Step #7.  Neutralize:  Your cleaned area/medium is pH balanced to eliminate soil attracting residues.

Step #8.  Post Spot Treatment:  Treatment of specialty spots is included.

Step #9:  Post-Grooming:  To set the appearance and faster drying.

Step #10:  Post Inspection:  A post walkthrough is performed with you to make sure you are thrilled!

Cleaning Length: The time to clean your items depends on the volume, and the amount of contents that require moving before, and after your cleaning. That said, most cleans take about 2 -3 Hours.

Drying Length: Drying time can vary based on severity of soiling, and humidity in the air. On it’s own, it can take approximately 3 – 6 hours to dry.

What’s NOT in a Freshen Up Cleaning

#1.  Pre Vacuuming: Research shows that 70% of most soiling in insoluble material (like sand), that will not dissolve or bond with a cleaning agent. This means that 70% is most productively removed by a deep, thorough vacuuming.

#2. Sanitizing: Sanitizing, involves reducing the number of microorganisms on surfaces to a safe level determined by public health standards. It aims to kill or inhibit the growth of bacteria, viruses, and other harmful microorganisms that may cause illness or contamination. Sanitizing typically involves using disinfectants or sanitizing solutions, that are specifically designed to kill or reduce the presence of pathogens.

#3. Deodorizing: Deodorizing eliminates or neutralizes unpleasant odors from a space, object, or surface. Here’s how deodorizing works and what it accomplishes:

Deodorizing agents are designed to chemically react with odor-causing molecules, altering their structure or neutralizing them. This helps eliminate the unpleasant smell rather than just masking it temporarily.

#4. Anti-Allergen: Anti-allergen treatments are designed to reduce or minimize the presence of allergens in the environment. Allergens are substances that can trigger allergic reactions in susceptible individuals. These reactions can range from mild symptoms like sneezing and itching to more severe responses such as difficulty breathing or anaphylaxis.

#5. Protectant: A protectant is a type of product that is applied to surfaces, materials, or objects to provide a layer of protection against various damaging factors. The purpose of a protectant is to enhance durability, longevity, and resistance to specific elements or conditions.

6. Speed Drying: Speed drying can be beneficial in cleaning processes for time efficency, Prevention of Mold and Mildew, Stain Prevention, Reduced Odor, Preservation of Materials.

It’s important to see the Freshen Up as the name states, it’s for areas, and items that are cleaned frequently, and thereby do not need the added value of pre-vacuuming, sanitizing, deodorizing, or anti-allergen treatments.

How to Clean a Dishwasher: A Step-by-Step Guide to Sparkling Results

A dishwasher is an indispensable appliance in the modern kitchen, streamlining the dishwashing process and saving valuable time. However, like any other appliance, it requires regular cleaning to maintain optimal performance and hygiene. In this article, we will guide you through the step-by-step process of cleaning your dishwasher, ensuring sparkling clean dishes with each cycle.

Step 1: Empty the Dishwasher: Before starting the cleaning process, make sure the dishwasher is empty. Remove any dishes, utensils, or debris from the racks, filters, and spray arms. This allows for thorough cleaning of all components.

Step 2: Clean the Filter: The filter in your dishwasher plays a crucial role in trapping food particles and preventing clogs. Start by locating the filter, usually at the bottom of the dishwasher. Depending on the model, the filter may twist or pull out. Remove the filter and rinse it under running water to dislodge any food debris. Use a soft brush or toothbrush to scrub away stubborn residue. Once clean, reinsert the filter into its place.

Step 3: Wipe Down the Interior: Using a damp cloth or sponge, wipe down the interior walls, door gasket, and detergent dispenser of the dishwasher. Pay special attention to any visible grime or residue. For stubborn stains or mineral buildup, a mixture of equal parts vinegar and water can be effective. Avoid using abrasive cleaners that may damage the interior.

Step 4: Clean the Spray Arms: The spray arms distribute water to clean the dishes. Over time, they can become clogged with debris or mineral deposits, affecting their efficiency. To clean the spray arms, gently remove them from their mountings. Clear any blockages by using a toothpick or small brush to dislodge particles from the spray holes. Rinse the arms thoroughly and reattach them.

Step 5: Descaling the Dishwasher: Mineral deposits from hard water can accumulate in your dishwasher and affect its performance. To remove these deposits, place a dishwasher-safe cup filled with white vinegar on the top rack. Run a hot water cycle without any dishes, using the vinegar to break down mineral buildup. Alternatively, you can use a dishwasher cleaner specifically designed for descaling. Follow the instructions on the product label for optimal results.

Step 6: Freshen the Interior: To eliminate any lingering odors, sprinkle baking soda on the bottom of the dishwasher. Run a short, hot water cycle to help neutralize odors and leave your dishwasher smelling fresh.

Step 7: Maintain Regularly: To keep your dishwasher in top condition, follow these maintenance tips:

  • Scrape off excess food from dishes before loading them into the dishwasher.
  • Regularly check and clean the filter to prevent clogs and maintain optimal performance.
  • Use a dishwasher cleaner or descaling agent every few months, especially in areas with hard water.
  • Inspect and clean the door gasket periodically to remove any debris or residue.

Cleaning your dishwasher not only ensures hygienic dishwashing but also extends the lifespan of the appliance. By following these step-by-step instructions, you can maintain a clean and efficient dishwasher, leaving you with spotless dishes after every cycle. Remember to consult the manufacturer’s guidelines for any specific recommendations for your dishwasher model.

How to Clean a Mattress: A Comprehensive Guide

How to Clean a Mattress: A Comprehensive Guide

Your mattress is where you spend a significant portion of your life, so it’s important to keep it clean and fresh. Regular cleaning not only helps maintain its appearance but also promotes better sleep and hygiene. In this guide, we combine insights, to provide you with a comprehensive approach to cleaning your mattress effectively.

Step 1: Strip the Bedding: Start by removing all bedding, including sheets, pillowcases, and mattress protectors. This step allows you to access the entire surface of the mattress for thorough cleaning.

Step 2: Vacuum the Mattress: Using the upholstery attachment on your vacuum cleaner, thoroughly vacuum the entire mattress surface. This step helps remove dust, dirt, allergens, and dead skin cells that accumulate over time. Pay special attention to seams, crevices, and edges.

Step 3: Spot Clean Stains: If you notice any stains on your mattress, it’s important to address them promptly. Consult the care instructions provided by your mattress manufacturer to determine the best approach for stain removal. In general, you can create a mixture of mild detergent and water or use a specialized enzyme-based cleaner to treat stains. Gently blot the stained area without saturating the mattress, and avoid rubbing, as it may spread the stain or damage the fabric.

Step 4: Deodorize the Mattress: To eliminate odors from your mattress, you can use baking soda, a natural deodorizer. Sprinkle a generous amount of baking soda evenly across the mattress surface, paying attention to any areas with lingering smells. Leave the baking soda on the mattress for at least a few hours, or preferably overnight, to allow it to absorb odors. Then, thoroughly vacuum the mattress again to remove the baking soda residue.

Step 5: Protect with a Mattress Cover: Consider using a mattress cover or protector to safeguard your mattress from spills, stains, and dust. A waterproof cover can also help prevent liquids from seeping into the mattress, which can lead to mold or mildew growth.

Step 6: Maintain Regular Cleaning: To keep your mattress in optimal condition, follow these maintenance tips:

  • Rotate your mattress every few months to ensure even wear and tear.
  • Use a mattress pad or topper to provide an additional layer of protection.
  • Wash your bedding regularly to prevent dirt and oils from transferring to the mattress.
  • Vacuum the mattress periodically to remove surface debris and allergens.
  • Keep pets away from the bed to minimize the transfer of pet dander and hair.

Conclusion: Regularly cleaning your mattress is essential for maintaining a healthy and comfortable sleep environment. By following this comprehensive guide, you can ensure that your mattress remains clean, fresh, and free from stains and odors. Remember to consult the specific care instructions provided by your mattress manufacturer and adapt the cleaning methods as needed.

Want a professional mattress cleaning?

While cleaning your mattress on your own can be effective, there are certain situations where hiring a professional cleaner may be beneficial. Here are some reasons why you might consider having a professional clean your mattress:

  1. Deep Cleaning Expertise: Professional mattress cleaners have specialized knowledge and expertise in deep cleaning techniques. They are trained to handle different types of mattresses and understand the most effective methods to remove stubborn stains, odors, and allergens.
  2. Specialized Equipment: Professional cleaners have access to advanced cleaning equipment and tools that can provide a deeper and more thorough clean than regular household vacuum cleaners. These specialized tools can reach into the mattress layers and effectively remove dirt, dust mites, and other debris.
  3. Allergy and Asthma Relief: If you or someone in your household suffers from allergies or asthma, professional mattress cleaning can help alleviate symptoms. Professionals can use hypoallergenic cleaning solutions and techniques to eliminate allergens such as dust mites, pollen, and pet dander more effectively.
  4. Time and Convenience: Cleaning a mattress can be a time-consuming task, especially if you’re dealing with deep stains or odors. Hiring a professional allows you to save time and effort as they handle the entire cleaning process, leaving you with a clean and fresh mattress without the hassle.
  5. Warranty Requirements: If your mattress is still under warranty, it’s essential to check the manufacturer’s guidelines. Some warranties require professional cleaning at specific intervals to maintain coverage. Hiring a professional cleaner ensures that you meet these requirements and keep your warranty valid.

It’s important to research and choose a reputable professional mattress cleaning service. Read reviews, ask for recommendations, and inquire about their cleaning methods and products to ensure they align with your specific needs and preferences.

Remember, professional cleaning may not be necessary for everyone, and regular at-home cleaning and maintenance can effectively keep your mattress clean and fresh.

Pet Odor Removal Service Cost

When it comes to pet odor removal services, the cost can vary depending on a variety of factors. Here are some things to keep in mind when considering the cost of pet odor removal:

5 Factors That Determine Pet Odor Removal Cost

  1. Size of the area: The larger the area that needs to be treated, the more expensive the service will be. Some companies charge by the square footage, while others have a flat fee.
  2. Severity of the odor: If the odor is particularly strong or has been present for a long time, it may require more intensive treatment, which can drive up the cost.
  3. Type of treatment: There are a variety of treatments available for pet odor removal, including steam cleaning, enzyme treatments, and ozone treatments. Each type of treatment has its own cost, so be sure to ask the company what they recommend and how much it will cost.
  4. Location: The cost of services can vary depending on where you live. Services in urban areas may be more expensive than those in rural areas.

On average, pet odor removal services can cost anywhere from $100 to $500, depending on the factors mentioned above. However, it’s important to remember that the cost of the service is often worth it in terms of improved air quality and a more pleasant living environment. Additionally, many pet odor removal companies offer discounts for repeat customers or for referring friends and family.

Benchmark Restoration & Cleaning is the Authority in Pet Odor Removal Service

Benchmark Restoration and Cleaning has established itself as an authority on pet odor removal through their extensive experience and expertise in the industry. Here are some reasons why:

  1. Specialization: Benchmark Restoration and Cleaning specializes in pet odor removal, which means that they have developed a deep understanding of the science behind pet odors and the most effective ways to remove them.
  2. Industry Recognition: The company has received industry recognition for their work in pet odor removal, including being certified by the Institute of Inspection Cleaning and Restoration Certification (IICRC).
  3. Professional Team: Benchmark Restoration and Cleaning has a team of trained professionals who are knowledgeable about pet odor removal techniques and use state-of-the-art equipment to ensure that the job is done right.
  4. Positive Reviews: The company has many positive reviews from satisfied customers who have experienced their pet odor removal services firsthand.
  5. Transparent Pricing: Benchmark Restoration and Cleaning offers transparent pricing and detailed explanations of their services, which helps build trust with customers and establishes them as a reliable authority in the industry.

All of these factors contribute to Benchmark Restoration and Cleaning’s reputation as an authority on pet odor removal. They have established themselves as a reliable and effective solution for those looking to eliminate unpleasant pet odors from their homes.

Experts at Pet Odor Removal Service Costs

Benchmark Restoration and Cleaning is a company that specializes in pet odor removal services. With years of experience and a team of trained professionals, they have developed expertise in removing pet odors from homes. Here are some reasons why Benchmark Restoration and Cleaning is an expert in pet odor removal:

  1. Specialization: As mentioned earlier, Benchmark Restoration and Cleaning specializes in pet odor removal. This means that they have developed a deep understanding of the science behind pet odors and the most effective ways to remove them.
  2. Advanced Techniques: Benchmark Restoration and Cleaning uses advanced techniques to remove pet odors, such as steam cleaning and enzyme treatments. They also use ozone treatments for particularly stubborn odors. These techniques require specialized knowledge and training to use effectively.
  3. State-of-the-art Equipment: The company uses state-of-the-art equipment to ensure that the job is done right. This includes high-powered vacuums, air scrubbers, and ozone generators.
  4. Certified Professionals: Benchmark Restoration and Cleaning has a team of certified professionals who are trained in pet odor removal techniques. They are knowledgeable about the different types of pet odors and the most effective treatments for each.
  5. Guaranteed Results: The company offers a guarantee that their pet odor removal services will be effective. If the odor returns within a certain timeframe, they will return to re-treat the area for free.
  6. Positive Reviews: Benchmark Restoration and Cleaning has many positive reviews from satisfied customers who have experienced their pet odor removal services firsthand. These reviews demonstrate the company’s expertise and effectiveness in removing pet odors.

In summary, Benchmark Restoration and Cleaning is an expert in pet odor removal services due to their specialization, advanced techniques, state-of-the-art equipment, certified professionals, guaranteed results, and positive reviews. If you’re struggling with unpleasant pet odors in your home, their expertise and experience can help you eliminate them for good.

How Benchmark Restoration and Cleaning is a trustworthy pet odor removal service.

Benchmark Restoration and Cleaning is a trustworthy pet odor removal service for several reasons:

  1. Transparent Pricing: Benchmark Restoration and Cleaning offers transparent pricing for their pet odor removal services. They provide detailed explanations of their services and pricing, which helps build trust with customers and establishes them as a reliable authority in the industry.
  2. Professional Team: Benchmark Restoration and Cleaning has a team of trained professionals who are knowledgeable about pet odor removal techniques and use state-of-the-art equipment to ensure that the job is done right. They are also courteous and respectful of customers’ homes and belongings.
  3. Guaranteed Results: The company offers a guarantee that their pet odor removal services will be effective. If the odor returns within a certain timeframe, they will return to re-treat the area for free. This guarantee demonstrates their confidence in their expertise and ability to deliver results.
  4. Industry Recognition: Benchmark Restoration and Cleaning has received industry recognition for their work in pet odor removal, including being certified by the Institute of Inspection Cleaning and Restoration Certification (IICRC). This certification demonstrates their commitment to maintaining high standards in the industry.
  5. Positive Reviews: The company has many positive reviews from satisfied customers who have experienced their pet odor removal services firsthand. These reviews demonstrate the company’s trustworthiness and effectiveness in removing pet odors.

In summary, Benchmark Restoration and Cleaning is a trustworthy pet odor removal service due to their transparent pricing, professional team, guaranteed results, industry recognition, and positive reviews. Customers can trust them to deliver effective results and treat their homes with respect and care.

Pet odor removal service cost in Vancouver Washington.

Pet owners know that dealing with unpleasant pet odors can be a frustrating and ongoing challenge. Whether it’s the lingering smell of urine, feces, or just general pet odors, it’s important to find a solution that is both effective and affordable. That’s where Benchmark Restoration and Cleaning comes in – a local Vancouver, Washington-based company that specializes in pet odor removal services. In this article, we’ll explore Benchmark Restoration and Cleaning’s pet odor removal service cost and what factors affect their pricing.

Benchmark Restoration and Cleaning’s Pet Odor Removal Service Cost

Benchmark Restoration and Cleaning offers a range of pet odor removal services, including steam cleaning, enzyme treatments, and ozone treatments. The cost of their pet odor removal services varies based on several factors, such as the severity of the odor, the size of the affected area, and the type of treatment required. Here is an overview of their pricing:

  • Basic pet odor removal with urine digestor: Starts at $125 for a small area (up to 100 sq. ft.) and $249 for a large area (up to 300 sq. ft.)
  • Advanced pet odor removal with a topical odor control: Starts at $275 for a small area and $499 for a large area. This includes advanced techniques such as enzyme treatments and ozone treatments.
  • Guaranteed pet odor removal: Starts at $375 for a small area and an evaluation for larger areas is recommended. This includes sealing the subfloor, removing and replacing affected tack strips, carpet pad, and thresholds. Then cleaning the carpet both from the top and bottom before using enzyme treatments and botanical disinfectant to be sure the urine is completely removed from your home

Note that these prices are subject to change and may vary based on your specific needs. It’s best to contact Benchmark Restoration and Cleaning directly for a personalized quote.

Factors That Affect Pet Odor Removal Service Cost

There are several factors that can affect the cost of pet odor removal services. These include:

  1. Severity of the Odor: The stronger the odor, the more time and resources it will take to remove it. This can increase the cost of the service.
  2. Size of the Affected Area: The larger the area, the more time and resources it will take to remove the odor. This can also increase the cost of the service.
  3. Type of Treatment Required: Different types of pet odors require different treatments. Some may require more advanced treatments, such as enzyme or ozone treatments, which can be more expensive.
  4. Location: The location of the affected area can also affect the cost of the service. For example, if the odor is in a hard-to-reach area, it may take more time and resources to remove it.

Why Choose Benchmark Restoration and Cleaning for Pet Odor Removal Services?

Benchmark Restoration and Cleaning is a locally owned and operated company that has been providing pet odor removal services in Vancouver, Washington for many years. They have a team of certified professionals who are trained in pet odor removal techniques and use state-of-the-art equipment to ensure that the job is done right. They offer a guarantee that their pet odor removal services will be effective and have many positive reviews from satisfied customers.

Conclusion

Dealing with pet odors can be a frustrating and ongoing challenge, but it’s important to find a solution that is both effective and affordable. Benchmark Restoration and Cleaning offers a range of pet odor removal services at competitive prices, and their team of certified professionals can help eliminate unpleasant pet odors from your home. If you’re struggling with pet odors in Vancouver, Washington, consider reaching out to Benchmark Restoration and Cleaning for a personalized quote.

About the author

Hi there, I’m Adam.

I’m a water damage restoration manager for Benchmark Restoration & Cleaning and working in Vancouver Washington. When I’m not restoring homes, I’m out exploring the National Parks with family.

Benchmark Restoration & Cleaning

11419 NE 126th St, Suite #116 Vancouver Washington 98662

Phone: 360-696-4140

Email: [email protected]

Carpet Not Drying After Cleaning?

If you’ve recently cleaned your carpet and noticed that it’s not drying properly, there could be a few reasons why. In this article, we’ll discuss some of the most common causes and solutions for a carpet that won’t dry after cleaning.

Causes and Solutions

  1. Humidity: If the humidity in your home is high, it can prevent your carpet from drying quickly. This is because the moisture in the air slows down the evaporation process. To combat this, you can turn on the air conditioning or a dehumidifier to reduce the humidity in your home.
  2. Lack of airflow: Without proper airflow, your carpet won’t dry as quickly as it should. Make sure to open windows and doors to let fresh air circulate, and use fans to increase air movement in the room.
  3. Using too much water: If you use too much water when cleaning your carpet, it can take a long time to dry. Make sure to follow the manufacturer’s instructions for your cleaning solution and avoid saturating the carpet.
  4. Using the wrong cleaning solution: Some cleaning solutions can leave behind a residue that can slow down the drying process. Make sure to use a cleaning solution that is specifically designed for your type of carpet.
  5. Carpet padding: If your carpet padding is wet, it can take a long time to dry. This is because the padding absorbs a lot of moisture. If possible, try to remove the padding and let it dry separately.
  6. Carpet age and condition: If your carpet is old or in poor condition, it may not dry as quickly as a newer carpet. This is because older carpets tend to hold more moisture.

Time To Call A Professional?

If you’ve tried all of these solutions and your carpet still isn’t drying, it may be time to call in a professional carpet cleaner. They can help identify the root cause of the problem and take steps to properly dry your carpet.

In conclusion, a carpet that won’t dry after cleaning can be frustrating, but there are steps you can take to speed up the drying process. By reducing humidity, increasing airflow, using the right cleaning solution, and addressing any underlying issues, you can help ensure that your carpet dries properly and stays in good condition.

How To Dry Carpet After Cleaning

After cleaning your carpet, it’s essential to ensure that it dries completely to prevent mold and mildew growth. Here are some tips on how to dry your carpet effectively:

7 Tips – How To Dry Carpet After Cleaning

  1. Use fans: Place fans around the room to increase air circulation and promote evaporation. Point them in the direction of the carpet, and if possible, open windows and doors to let fresh air in. Ceiling fans can also help to circulate the air in the room.
  2. Use a dehumidifier: If the humidity in the room is high, it can slow down the drying process. A dehumidifier can help to remove excess moisture from the air and speed up the evaporation process.
  3. Use towels: If there is excess water on the carpet, use clean towels to blot the area. Place a dry towel on top of the wet area and press down with your feet or hands to absorb the moisture. Replace the towel with a dry one as it becomes wet.
  4. Use a wet/dry vacuum: A wet/dry vacuum can be used to remove excess water from the carpet. Use the vacuum to suction up as much water as possible. Be sure to follow the manufacturer’s instructions for using the vacuum on wet surfaces.
  5. Elevate furniture: If there is furniture on the carpet, lift it off the floor using furniture pads or blocks to prevent it from absorbing moisture from the carpet.
  6. Use baking soda: Once the carpet is mostly dry, sprinkle baking soda over the surface. This will help to absorb any remaining moisture and remove any odors.
  7. Call in a professional: If you’ve tried all these methods and the carpet still isn’t drying, it may be time to call in a professional carpet cleaner. They will have specialized equipment and expertise to dry your carpet thoroughly.

In conclusion, if your carpet not drying after cleaning, drying your carpet after cleaning is crucial to prevent mold and mildew growth. By using fans, a dehumidifier, towels, a wet/dry vacuum, elevating furniture, using baking soda, or calling in a professional, you can ensure that your carpet dries quickly and stays in good condition.

About the author

Hi there, I’m Adam.

I’m owner of Benchmark Restoration & Cleaning and working in Vancouver Washington. When I’m not restoring homes, I’m out exploring the National Parks with family.

Benchmark Restoration & Cleaning

11419 NE 126th St, Suite #116 Vancouver Washington 98662

Phone: 360-696-4140

Email: [email protected]

Cleaning A Rug With Dog Pee

Updated November 17th, 2023

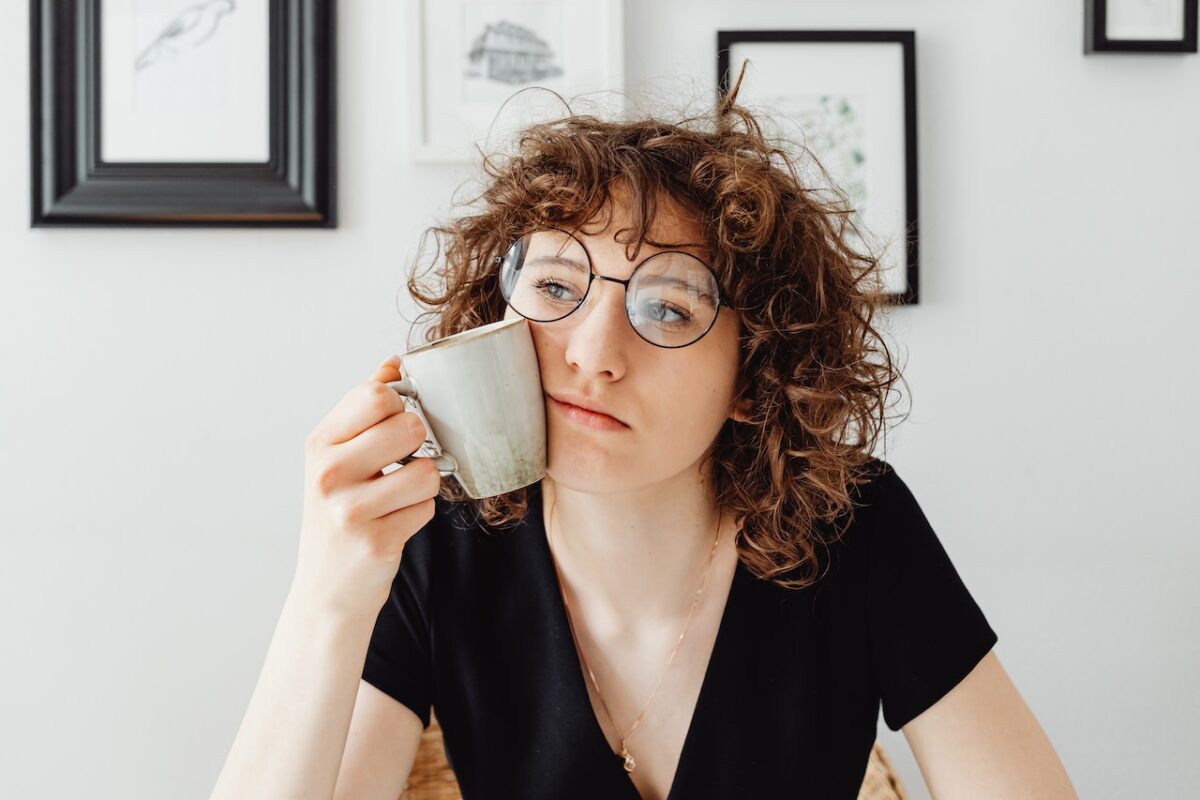
Hey, my pet owners! THIS IS AN UPDATE:

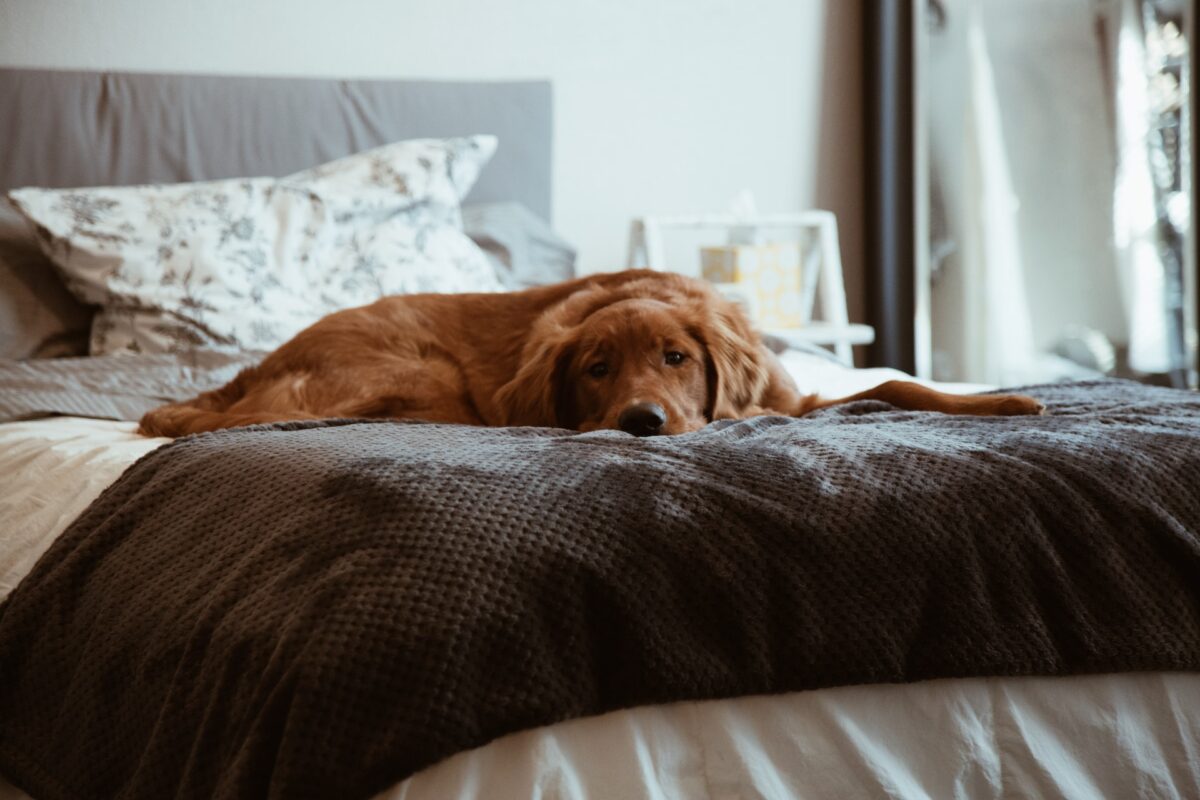
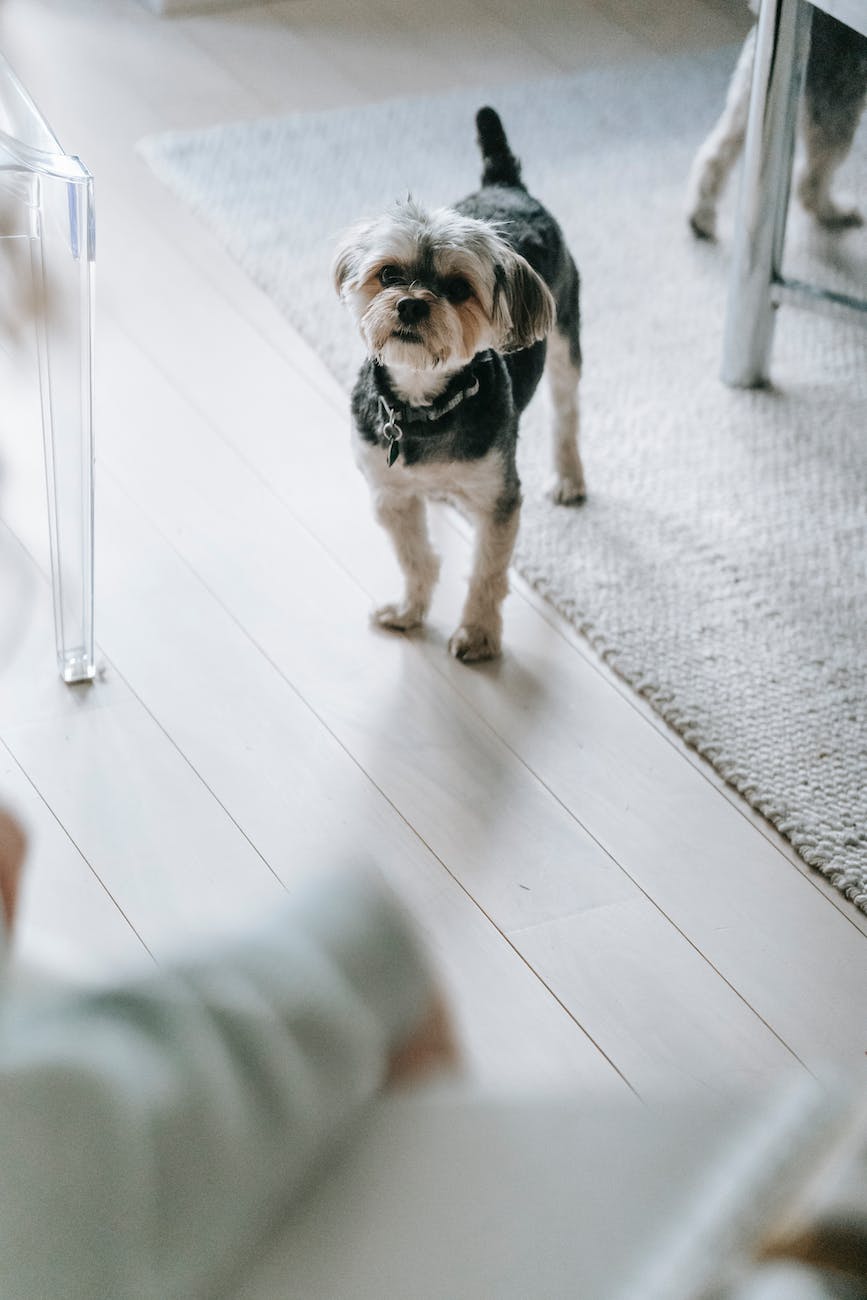
Today, I want to tackle a real-life challenge that many of us pet owners face – cleaning up after our furry friends. Specifically, I’m diving into the messy world of dealing with dog pee on your favorite rug. Now, I know it’s not the glamorous topic we usually discuss, but let’s face it, life gets messy, and we’ve got to clean it anyway!

First thing’s first

First things first, if you think that you can clean better (no offense) than Benchmark Restoration & Cleaning, with the solutions, the equipment, the cleaning trucks that cost a quarter of a million dollars than your crazy!

But if you’ve got a canine companion, accidents happen. And you want to do it yourself It’s not a matter of if, but when. But fear not, because I’m about to drop some serious knowledge bombs on how to clean that rug like a boss.

  1. Act Fast, Clean Harder: You’ve got to jump on that pee stain like you jump on opportunities – fast and with determination. The longer you wait, the tougher it gets. Grab some paper towels, old rags, or anything absorbent and blot, blot, blot. Soak up as much of that liquid as possible.
  2. Natural Allies: Vinegar and Baking Soda Let’s talk about two of my favorite natural cleaning warriors – vinegar and baking soda. Mix equal parts water and vinegar in a spray bottle and saturate the stained area. Then, sprinkle some baking soda on top. It’s going to fizz, and that’s the magic happening. Let it sit for 15 minutes and then scrub away. This combo will neutralize the odor and lift the stain.
  3. Enzyme Cleaners – Game Changer Alert: If you’re serious about obliterating that dog pee, invest in an enzyme cleaner. These bad boys break down the proteins in the urine, eliminating both the stain and the smell. Apply it generously, let it work its magic, and watch the stain disappear.
  4. Steamy Success: If your rug can handle it, break out the steam cleaner. This powerhouse will blast away any remaining residue and leave your rug looking and smelling fresh. It’s like the power of social media engagement, but for your floor coverings.
  5. Learn from the Experience: Just like in business, every challenge is an opportunity to learn and grow. Consider this dog pee debacle a lesson in resilience. Maybe it’s time to implement a stricter potty routine for your pup or invest in some puppy training pads. Learn from the experience, adapt, and hustle on.

So there you have it, my friends – a no-nonsense guide to cleaning dog pee by youself from your rug. Life is full of messy moments, but as long as you tackle them head-on and stay resilient, you’ll come out on top. Now go out there and crush it – both in business and in cleaning up after your furry friends! 🐾💪 #DogPeeNoMore


From the original post

There is two ways to achieve the goal of cleaning a rug with dog pee in it. 1.) Do it yourself, 2.) Hiring a professional. In this article you will read how both are performed, and the upside, and downside of both. If you are wanting to clean an area rug with dog pee, you’ve found the right place.

See other D.I.Y. posts from Benchmark Restoration & Cleaning

DIY How To Clean A Rug With Dog Pee

Cleaning a rug that has been soiled with dog urine can be a daunting task, but with the right tools and techniques, it can be done effectively. Here is a step-by-step guide on how to clean a rug with dog pee:

Materials you’ll need:

  • Paper towels or a clean cloth
  • Enzymatic cleaner
  • A spray bottle
  • Baking soda
  • Vacuum cleaner

Step 1: Act Quickly The first step in cleaning up dog urine from a rug is to act quickly. The longer the urine sits on the rug, the more difficult it will be to remove the odor and stain. So, as soon as you notice the urine, grab some paper towels or a clean cloth and blot up as much of the urine as possible. Be sure to press down firmly and absorb as much liquid as possible.

Step 2: Apply Enzymatic Cleaner Once you have removed as much urine as possible, it’s time to apply an enzymatic cleaner. These cleaners contain enzymes that break down the proteins in urine, eliminating the odor and preventing your dog from marking the same spot again. Follow the instructions on the bottle and saturate the affected area with the cleaner.

Step 3: Let the Enzymatic Cleaner Soak In After applying the enzymatic cleaner, allow it to soak into the rug for at least 10-15 minutes. This will give the enzymes time to break down the urine proteins.

Step 4: Blot the Area After allowing the cleaner to soak in, use a clean cloth or paper towels to blot the area once again. This will remove any excess moisture and help to remove any remaining urine.

Step 5: Apply Baking Soda Sprinkle a generous amount of baking soda over the affected area. Baking soda is a natural deodorizer and will help to absorb any remaining odors. Allow the baking soda to sit on the rug for at least 30 minutes.

Step 6: Vacuum the Rug After the baking soda has had time to sit, use a vacuum cleaner to remove it from the rug. Be sure to use the crevice tool to get into the edges of the rug where the urine may have seeped.

Step 7: Repeat if Necessary If the odor and stain are still present after the first attempt, repeat the process. It may take several attempts to completely eliminate the odor and stain.

In conclusion, cleaning a rug with dog pee may seem like a daunting task, but it can be done with the right tools and techniques. Remember to act quickly, use an enzymatic cleaner, and be patient. With a little effort, you can restore your rug to its former glory.

Hiring a Professional to Clean a Rug With Dog Pee

When hiring a professional to clean a rug with dog pee, there are a few important factors to consider. Here are some things to look for:

  1. Experience and Expertise: Look for a company that has experience in cleaning rugs and carpets that have been soiled with pet urine. They should be knowledgeable about the best cleaning methods and have the expertise to handle different types of rugs and fibers.
  2. Certification: Make sure that the company you choose is certified by a professional organization, such as the Institute of Inspection, Cleaning and Restoration Certification (IICRC). This certification ensures that the company follows industry standards and best practices.
  3. Reputation: Check the company’s reputation online by reading reviews and testimonials from previous customers. Look for a company that has a high rating and positive reviews, as this indicates that they provide quality services.
  4. Pricing: Ask for a detailed estimate before hiring a company. Make sure that they are transparent about their pricing and that there are no hidden fees.
  5. Guarantee: Look for a company that offers a satisfaction guarantee or warranty for their services. This will give you peace of mind knowing that if you are not satisfied with the results, they will make it right.
  6. Equipment and Cleaning Products: Ensure that the company uses high-quality equipment and cleaning products that are safe for your rug and pets. They should be able to explain the cleaning products and equipment they use and their benefits.

By considering these factors, you can find a professional cleaning company that can effectively clean your rug and remove all traces of dog urine, leaving it looking and smelling fresh and clean.

How Benchmark Restoration & Cleaning Cleans a Rug With Dog Pee

Benchmark Restoration & Cleaning is a professional cleaning company that specializes in cleaning carpets and rugs, including those that have been soiled with dog urine. Here’s how they clean a rug with dog pee:

Step 1: Inspection The first step in the cleaning process is to inspect the rug for any damage or discoloration caused by the urine. They will also identify the type of rug and its fibers to determine the best cleaning method.

Step 2: Dry Soil Removal Before any cleaning can take place, Benchmark Restoration & Cleaning will thoroughly vacuum the rug to remove any dry soil or debris that may be trapped in the fibers.

Step 3: Pre-Treatment Once the dry soil has been removed, the affected area will be pre-treated with a specialized urine remover that is specifically designed to break down the proteins in dog urine. The solution is allowed to sit for a few minutes to penetrate the fibers.

Step 4: Extraction After the pre-treatment has been allowed to sit, the rug is then cleaned using a hot water extraction method. This involves using a high-pressure cleaning solution to rinse the rug and extract the urine and cleaning solution. The high-pressure water also helps to loosen any remaining dirt and debris.

Step 5: Post-Treatment After the rug has been thoroughly cleaned, a post-treatment solution is applied to neutralize any remaining odors and prevent the dog from marking the same spot again.

Step 6: Drying The rug is then allowed to dry completely. Depending on the type of rug and the severity of the urine damage, it may need to be dried using a specialized drying process to prevent any shrinkage or damage to the fibers.

Step 7: Final Inspection Once the rug has dried, Benchmark Restoration & Cleaning will conduct a final inspection to ensure that all traces of urine and odors have been removed. They will also check for any damage to the rug that may have been caused by the urine.

In conclusion, cleaning a rug with dog urine can be a difficult and time-consuming task. However, by hiring a professional cleaning company like Benchmark Restoration & Cleaning, you can rest assured that your rug will be thoroughly cleaned and restored to its original condition. With their specialized equipment and expertise, they can ensure that all traces of urine and odors are removed, leaving your rug looking and smelling fresh and clean.

The difference between doing it yourself or hiring a professional

What’s the difference between removing dog pee from an area rug myself or hiring a professional?

There are several differences between hiring a professional cleaning company to remove urine from a rug and doing it yourself:

  1. Expertise and Knowledge: Professional cleaning companies have the experience and knowledge to effectively remove urine stains and odors from rugs. They know which cleaning solutions and techniques to use based on the type of rug and fibers, ensuring that the rug is cleaned without causing any damage.
  2. Equipment and Cleaning Products: Professional cleaning companies use high-quality equipment and cleaning products that are not typically available to the average homeowner. They have access to specialized equipment, such as hot water extraction machines and industrial-strength vacuums, which can effectively remove the urine and any associated odors.
  3. Time and Effort: Cleaning a rug with urine can be a time-consuming and labor-intensive process. Professional cleaning companies have the equipment and expertise to clean the rug quickly and efficiently, allowing you to focus on other tasks.
  4. Guaranteed Results: Professional cleaning companies typically offer a satisfaction guarantee or warranty for their services. This means that if you are not satisfied with the results, they will return to re-clean the rug or offer a refund.
  5. Cost: While hiring a professional cleaning company may cost more than doing it yourself, it can save you money in the long run. DIY cleaning methods may not effectively remove all the urine and odor, requiring you to clean the rug multiple times or even replace it.

In summary, while it is possible to clean a rug with urine yourself, hiring a professional cleaning company can provide more efficient and effective results. They have the expertise, equipment, and knowledge to remove urine stains and odors, saving you time and effort while also ensuring the rug is cleaned without causing damage.

Want other D.I.Y. Tips?

Removing Wine Stains from Carpet This Season.

Post-Meal Carpet Cleaning: Feast for Eyes, Not Floors.

Heat Matters: The Critical Importance of Fall and Winter Air Duct Cleaning.

10 Cleaning Hacks Before Guests Hit Your Home this Season.

About the author

Hi there, I’m Adam.

I’m a water damage restoration manager for Benchmark Restoration & Cleaning and working in Vancouver Washington. When I’m not restoring homes, I’m out exploring the National Parks with family.

Benchmark Restoration & Cleaning

11419 NE 126th St, Suite #116 Vancouver Washington 98662

Phone: 360-696-4140

Email: [email protected]